Seamwork Beckett Overalls: Fitting & Custom Pockets
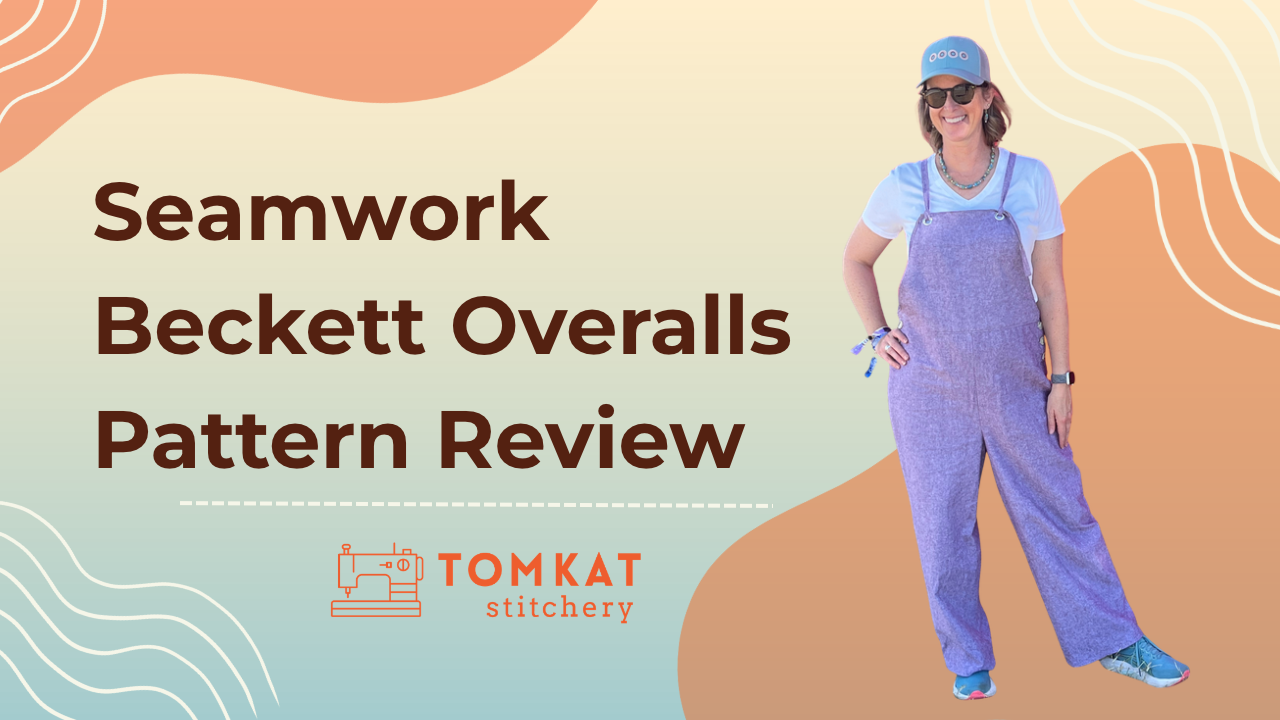
There's something so satisfying about making a garment that you know you're going to wear all the time, especially when you can customize it to suit your needs! Today, Jenni is sharing her latest sewing project, the Seamwork Beckett Overalls, and I think these might be one of my favorite things she's made this year.
If you've been following Jenni's sewing journey, you know she set a goal of sewing one garment each month in 2026. She's making great progress, and these overalls are another addition to her handmade wardrobe.
What makes this project particularly fun is that Jenni didn't just follow the pattern instructions. She made some fitting adjustments, tackled new sewing techniques, and even went back to add pockets after wearing the finished overalls!
Read on for all the details, or watch our video to see how everything came together.
Why Jenni Chose the Seamwork Beckett Overalls
This project started with a pair of overalls Jenni made about two years ago using a different Seamwork pattern. She loved them! They were lightweight, comfortable, and perfect for traveling or wearing as an easy layer.
Unfortunately, those original overalls accidentally went through the dryer and shrank considerably. They became too short for Jenni, although a shorter friend was happy to give them a new home!
Jenni knew she wanted another pair, but with a few changes. Her original overalls had pockets positioned too low, and the straps weren't adjustable. Since she's tall, she wanted something with more flexibility.
That's where the Seamwork Beckett Overalls came in.
What are the features of the Seamwork Beckett Overalls?
The Beckett is a relaxed overall pattern with several useful details:
- Comfortable, loose-fitting silhouette
- Adjustable shoulder straps threaded through grommets
- Side button closures
- Back patch pockets
- Front and back yoke details
- Multiple lengthen/shorten locations
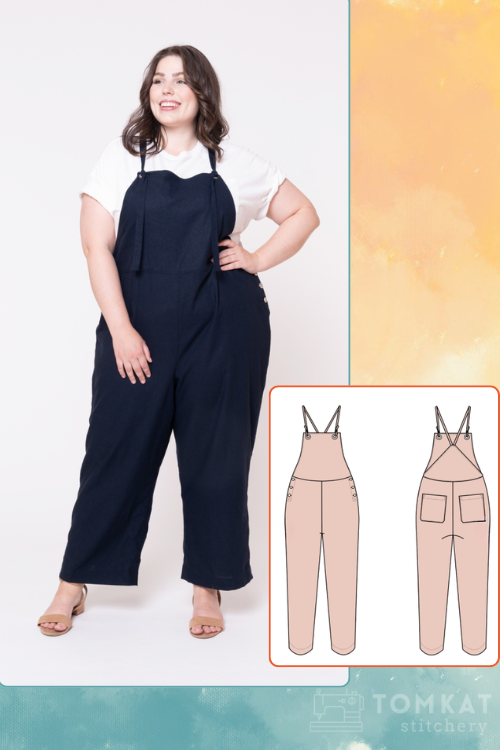
The adjustable straps were particularly appealing, and while the pattern doesn't include front pockets, Jenni eventually found a way to change that!
Choosing the Fabric: Essex Linen/Cotton Blend
Jenni knew exactly what fabric she wanted because she'd loved the material in her original overalls.
She chose a beautiful eggplant-colored Robert Kaufman Essex yarn-dyed linen/cotton blend from the University of Sewing.
Shop the Eggplant Essex Linen/Cotton Blend
Use code TOMKAT for 15% off regularly priced fabrics!*
One of the things Jenni loves about this fabric is its yarn-dyed appearance. The warp and weft yarns are different colors, creating subtle texture and dimension.
Is linen/cotton a good fabric for sewing overalls?
A midweight linen/cotton blend is a wonderful choice for relaxed overalls because it offers enough structure to maintain the garment's shape while remaining breathable and comfortable.
Jenni wanted something that would provide sun coverage without feeling too warm or restrictive. This fabric was perfect for that purpose.
And after her previous experience, she made sure to prewash everything before cutting!
Fitting the Beckett Overalls for a Taller Body
One of the things I appreciate about Jenni's sewing is how much more comfortable she's becoming with making fitting decisions.
Rather than automatically following the pattern, she considered what had worked for her previously.
What fitting adjustments did Jenni make?
Jenni made two primary adjustments:
- Sized up to a 14: Her previous overalls were a size 12, but she wanted extra ease in this version.
- Added one inch to the torso: Seamwork patterns generally fit Jenni well, but she typically adds an inch of length to their tops. She followed that same approach here, adding an inch to both the front and back upper sections.
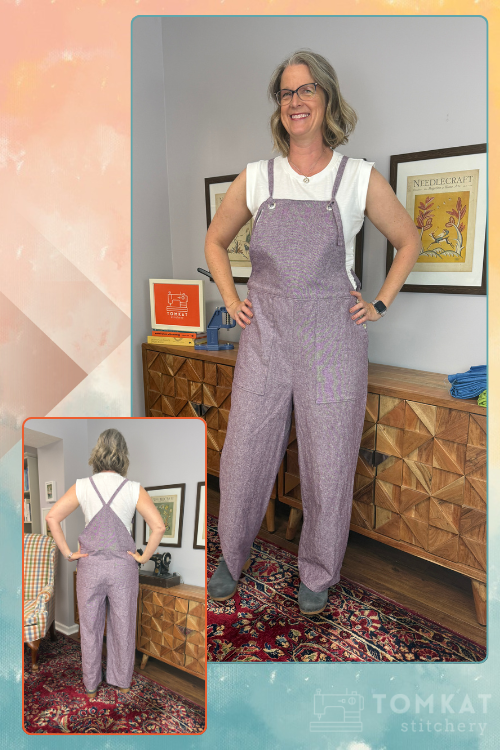
The Beckett includes three locations where length can be adjusted: the upper torso, hip, and knee.
Jenni considered where to add her extra length but ultimately chose the torso because that's where she typically needs it in Seamwork patterns.
She left the pant legs at their drafted length. Jenni isn't a fan of cropped pants, so she wanted to preserve as much leg length as possible!
Putting the Overalls to the Test
Jenni's new overalls made their debut at a music festival in September, where the weather was sunny and warm.
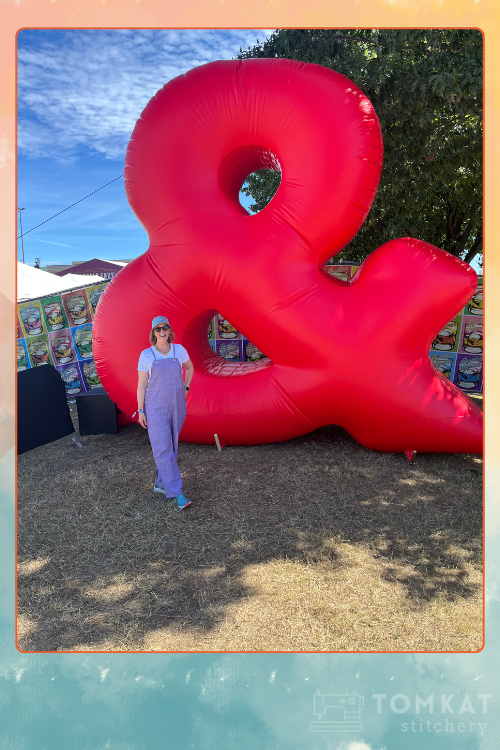
They were exactly what she'd hoped for: breezy, comfortable, and easy to wear all day. The loose silhouette meant nothing felt restrictive, and the full-length legs provided the sun coverage she wanted.
But that first outing revealed something important.
She really needed front pockets!
The Beckett includes back pockets, but Jenni discovered she didn't like keeping her phone there, particularly while moving around at a crowded festival.
Rather than accept the lack of pockets, she decided to modify the finished garment.
Adding Custom Front Pockets to the Beckett Overalls
This is probably my favorite part of Jenni's project!
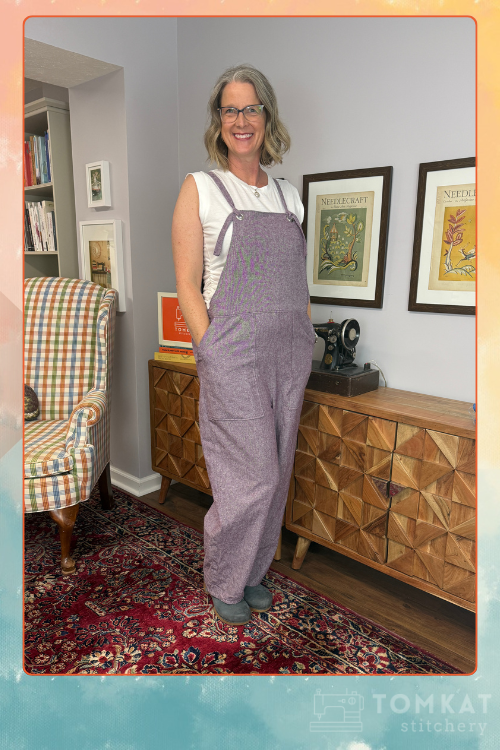
She considered adding in-seam pockets, but the side button plackets would have pushed them too low. She also considered a pouch-style pocket at the waist but worried about unwanted bulk.
Instead, she decided to add front patch pockets secured into the existing seams.
How did Jenni add pockets to her finished overalls?
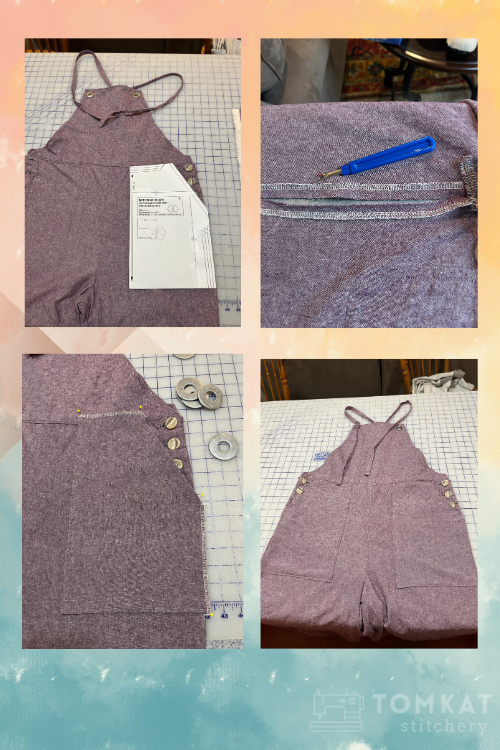
Jenni borrowed a pocket pattern piece from the Pattern Emporium Vacation Vibes Pants, a pattern I've also sewn.
She chose the size 14 pocket to correspond with her overall size and experimented with placement to make sure the proportions looked right.
Here's how she approached the modification:
- Prepared the pockets: She cut two pockets from her leftover fabric and finished the raw edges with her serger.
- Stabilized the openings: She added interfacing along the pocket openings before folding and stitching them in place.
- Opened the existing seams: She carefully unpicked the side seams below the button plackets and the seams along the upper front yoke.
- Attached the pockets: She basted the pockets along the upper edge and secured them into the side seams.
- Reassembled the overalls: She folded the front yoke back into place, enclosing the upper pocket edges.
- Finished with topstitching: She topstitched the remaining pocket edges and repeated the process on the opposite side.
The result looks like the pockets were part of the original design!
What I love most is that Jenni figured out this modification herself. There weren't any instructions to follow. She thought through how the garment had originally been constructed, worked backward to open the necessary seams, and then put everything back together.
That's a fantastic example of how understanding garment construction gives you the confidence to customize your sewing projects.
Building Confidence with Buttonholes and Grommets
The pockets weren't Jenni's only sewing accomplishment with this project.
She also decided it was time to conquer something she'd been avoiding: making buttonholes on her own sewing machine!
Previously, Jenni would come over and use my Bernina 790 whenever she needed buttonholes. This time, she sat down with her machine manual and scrap fabric and practiced until she was happy with the results.
It took about three tries, but she got there!
She added three buttons from her stash along the side closure. Because the overalls have plenty of ease, she doesn't actually need to undo them to get dressed, but they're a cute design detail.
The Beckett also uses grommets at the top of the bib for the adjustable straps, and Jenni installed those herself, too!
It's been so much fun watching her confidence grow as she takes on more techniques independently.
Can a beginner sew the Seamwork Beckett Overalls?
If you're comfortable with basic garment construction and ready to try a few new skills, the Beckett could be a great next project.
The relaxed fit makes it less demanding than a closely fitted garment, although you'll still want to pay attention to the torso length and overall proportions.
If you're newer to garment sewing and want to build a solid foundation, my Introduction to Garment Sewing course is a great place to start.
We work through the essential techniques that will help you approach new patterns with more confidence.
One More Custom Detail: Embroidery!
Jenni isn't quite finished personalizing these overalls.
The large back section offers a wonderful opportunity for embellishment, and she's planning to add an abstract machine embroidery design.
We found a six-inch circular design from OESD that she thinks will be perfect.
She's envisioning these overalls as part of a comfortable, slightly artsy wardrobe, paired with handknit sweaters, clogs, and cozy socks.
We'll share that update over on Instagram once we get the embroidery machine set up!
Final Thoughts on the Seamwork Beckett Overalls
I think Jenni did a fantastic job with these overalls, and I'm especially impressed with how she approached the customization.
She started with a pattern that offered the relaxed silhouette and adjustable straps she wanted, chose a fabric she already knew she'd love, and made fitting adjustments based on her previous sewing experience.
Then, after wearing the finished garment, she recognized something that wasn't working and figured out how to improve it.
That's one of the best things about sewing your own clothes. You're not limited to what a pattern designer includes or what you find in a store. You can make adjustments to create something that works for your body and your lifestyle.
If you've been thinking about making a pair of overalls, the Seamwork Beckett is definitely worth a look.
*Affiliate links included—thank you for supporting my work! No extra cost to you, but I may earn a commission. Offers may change.