Sewing a Ballroom Gown with Charm Patterns
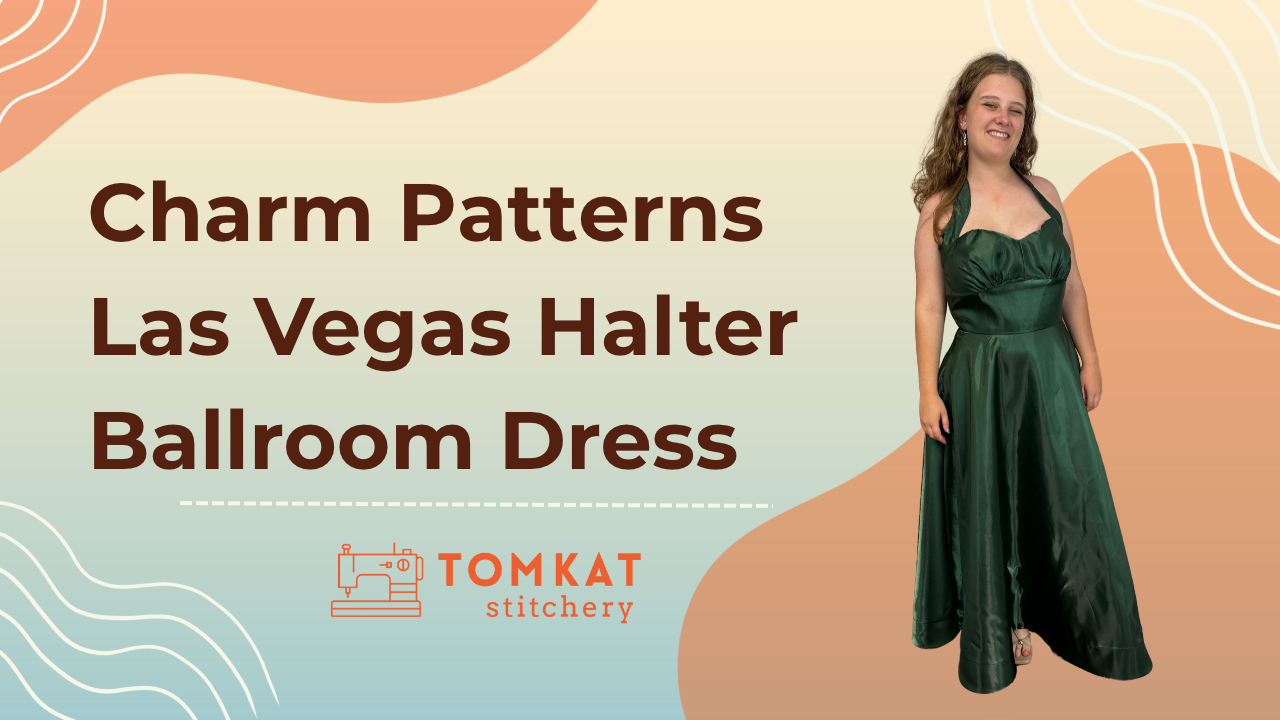
Most of my sewing focuses on everyday clothing, so it's not often that I get to make something as fancy as a formal gown! But now that my daughter is part of the ballroom dancing club at her university, I have a good reason to pull out the satin and make something special.
Her club hosts two formal dances each year: a masquerade ball around Halloween and a sweetheart's ball around Valentine's Day. While she wants a beautiful dress for each occasion, there's one very important requirement. It has to be twirlable! After all, what's the point of a ballroom dancing dress if the skirt doesn't move beautifully on the dance floor?
For this year's masquerade ball, we chose the Charm Patterns Las Vegas Halter Top and transformed it into a floor-length gown using gorgeous olive green liquid satin. With a few fitting adjustments and some extra structure, we ended up with a dress that's elegant but made for dancing!
Choosing the Charm Patterns Las Vegas Halter
The Charm Patterns Las Vegas Halter Top and Bodice was an easy choice because we'd already sewn this pattern for my daughter over the summer.
That first version was a linen peplum top inspired by a ready-to-wear design she loved. We even added little seashells along the bottom! More importantly, it gave us the opportunity to work through the fitting adjustments before cutting into expensive formalwear fabric.
Meet the Charm Patterns Las Vegas Halter
One of my favorite things about Charm Patterns is the ability to mix and match designs within their Lamour pattern series. The Las Vegas bodice can be paired with different skirts, making it a versatile starting point for all kinds of garments.
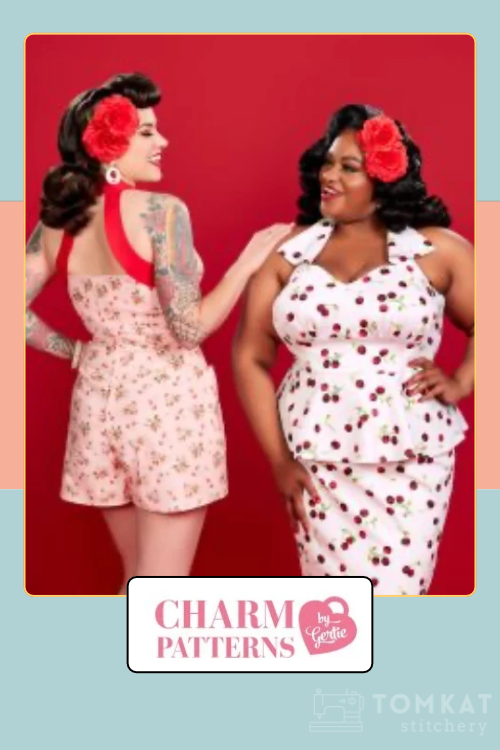
Some of the features I especially like include:
- A halter neckline with a fitted, gathered bust
- Multiple cup size options for a customized fit
- A fitted, lined bodice
- A peplum option that can be extended into a skirt
- Compatibility with other skirts in the Lamour series
For my daughter's dress, we used a size 8 with the largest available cup size. Because we'd already made the linen version, I knew which adjustments were needed before cutting the satin.
Fitting the Las Vegas Bodice
The Las Vegas halter isn't necessarily an easy pattern to fit as you sew. Because of the way the straps and lining are constructed, several pieces need to be assembled before you can properly try it on.
That's why our previous linen version was so valuable. It was essentially a wearable muslin, and I could transfer the adjustments directly to the pattern.
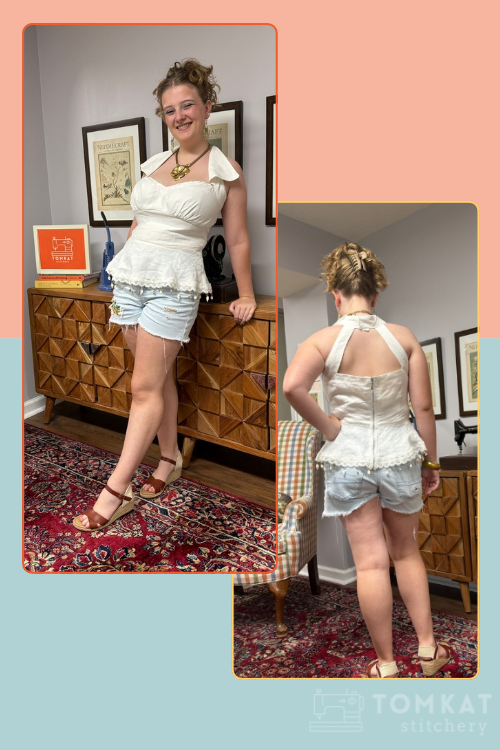
Fitting Adjustments
Here's what I changed for the formal version:
- Shortened the straps: I removed 3/8 inch from both the front and back straps, for a total reduction of 3/4 inch. This brought the neckline closer to her body and improved the fit.
- Added clear elastic to the bustline: On the linen version, the upper edge of the cups wanted to stand away from her body. This time, I gently stretched clear elastic along the upper cup edge, drawing the fabric in just enough to hug her bust.
- Added side-seam boning: I inserted lightweight plastic boning into channels along the lining's side seams to give the bodice additional support.
The boning was particularly easy to add. I pressed the lining's side seam allowances toward the back and topstitched them down at 3/8 inch, creating channels for the plastic boning.
It doesn't make the bodice overly rigid, but it adds just enough stability to help everything stay in place.
And the best part? When my daughter tried on the dress, the fit was nearly perfect. The only adjustment we needed was shortening the hem!
Choosing the Perfect Green Satin
For the fabric, my daughter and I chose Liquid Bridal Satin in Olive Green from Kiki Textiles.
We looked at several formalwear fabrics, including crepe-back satins, but she fell in love with the beautiful liquid-like shimmer of this one.
The color is a deep, moody green with almost blue undertones. My daughter is a Calm Summer according to her seasonal color analysis, so this isn't necessarily a perfect match for her palette. But it's definitely palette-adjacent, and more importantly, she loved it!
Sometimes that's all the reason you need to choose a fabric.
Why I Interlined the Bodice with Flannel
This satin has a beautiful sheen and a good amount of body, which makes it wonderful for a formal gown. However, structured satin can create sharp folds and creases when pressed.
The Las Vegas bodice has lovely gathers underneath the bust, and I wanted those gathers to look softer.
My solution was to interline the entire bodice with flannel.
And here's the fun part: I used my daughter's old Frozen bedsheets!
I've kept several sets of flannel sheets from when my children were younger, and they've become wonderful resources for sewing projects. The flannel adds a soft layer behind the satin, helping the fabric behave the way I wanted.
How I Interlined the Bodice
Interlining is different from lining. Rather than creating a separate interior layer, the interlining is attached directly to the fashion fabric so the two layers behave as one.
Here's how I did it:
- Cut the flannel using the same bodice pattern pieces as the satin.
- Place each flannel piece against the wrong side of its corresponding satin piece.
- Machine-baste around all the edges to hold the layers together.
- Construct the bodice following the pattern instructions, treating the two fabrics as a single layer.
I also used the same green satin for the actual bodice lining so there wouldn't be any contrasting fabric peeking out around the neckline. Only the bodice is lined; the skirt is a single layer of satin.
Turning the Las Vegas Peplum into a Ballroom Gown
One of the simplest changes I made was transforming the original peplum into a floor-length skirt.
Rather than drafting an entirely new skirt or using another pattern, I simply extended the existing peplum pieces.
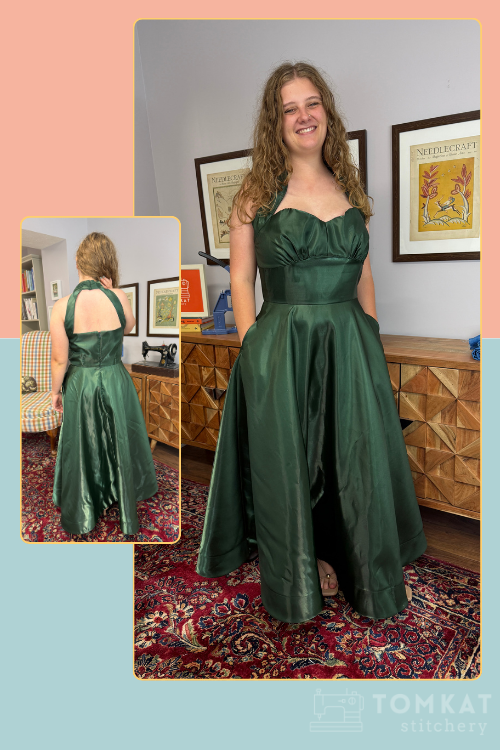
Extending the Skirt
I placed the peplum pattern pieces on the fabric and used a yardstick to extend the hemline by 33 inches, following the shape of the original skirt.
I intentionally made it longer than necessary because I knew we'd need to adjust the final length when my daughter came home to try it on. We ultimately removed about four inches from the hem.
The finished skirt has more fullness than a traditional A-line skirt but isn't quite a full circle skirt. It provides beautiful movement without requiring the enormous amount of fabric that a full circle skirt would have needed.
I started with six yards of satin and used approximately five yards for the dress.
Adding Pockets and an Invisible Zipper
Of course, we couldn't make this dress without pockets!
The Las Vegas pattern doesn't include pockets, so I borrowed the pocket pieces from the Charm Patterns Homecoming Skirt and added them into the side seams. My daughter was thrilled, and apparently her roommates were equally excited!
Even formal gowns deserve pockets!
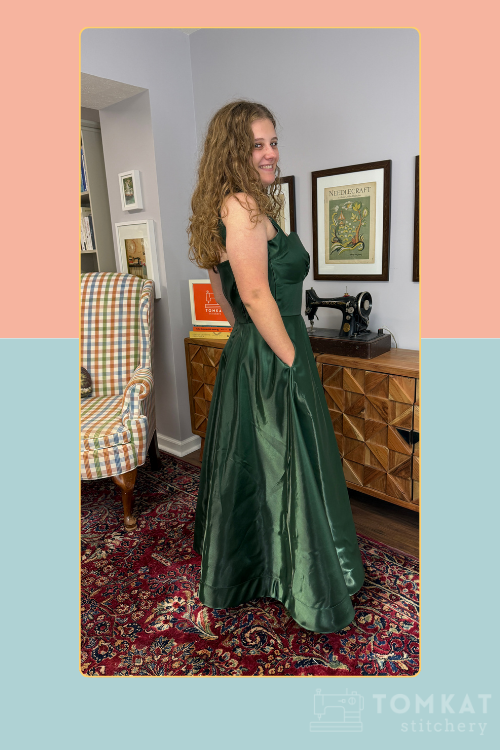
The original Las Vegas peplum top uses a separating zipper, but that wasn't necessary for this dress. Instead, I installed an approximately 22-inch invisible zipper in the center back, giving the finished gown a clean, polished appearance.
Adding Horsehair Braid for a Twirl-Worthy Hem
The skirt needed to look beautiful standing still, but it also needed to move when my daughter was dancing.
That's where horsehair braid came in.
Horsehair braid is a flexible, structured trim that can be sewn into a hem to give it additional body and shape. It's especially useful for formal dresses and skirts where you want the hem to stand away from the body.
I added horsehair braid around the entire hem of the gown. This gives the skirt extra weight and structure, helping it kick outward when she spins on the dance floor.
Do You Have to Hand-Sew a Horsehair Braid Hem?
Absolutely not!
On a previous formal gown, I spent quite a bit of time hand-sewing a blind hem. This time, I decided to topstitch the hem instead.
And you know what? It looks great!
Because this is a floor-length dress, the stitching is barely noticeable. Sometimes it's worth choosing the technique that gives you a beautiful, practical result without adding hours of unnecessary work.
Why Making a Wearable Muslin Was Worth It
One of the biggest takeaways from this project is just how valuable our first version of the Las Vegas halter turned out to be.
When I made the linen peplum top earlier this year, I wasn't necessarily thinking about using the pattern for a formal gown. But because my daughter loved the fit and wore the top, I had a reliable starting point for this project.
We already knew the correct size, the strap adjustments, and how to improve the fit around the bust.
That meant I could confidently cut into our beautiful satin without worrying about major fitting surprises.
And because my daughter is away at college, that confidence was especially important. We didn't have the luxury of multiple fittings throughout the sewing process.
When she finally tried it on, we only needed to pin up the hem. That's a pretty wonderful result for a formal gown!
A Handmade Dress for a Special Occasion
I don't sew formalwear very often, but projects like this remind me how much fun it can be to step outside my usual everyday wardrobe sewing.
The Charm Patterns Las Vegas halter gave us a great foundation, and the combination of liquid satin, flannel interlining, lightweight boning, and horsehair braid created exactly the look my daughter wanted.
She's even using some of the leftover green satin to cover a mask for the masquerade ball, so everything will coordinate beautifully!
But my favorite part isn't really the satin or the construction techniques. It's getting to use my sewing skills to make something special for my daughter.
Every time I make her a new formal dress, she tells me it's her favorite one yet. And I have to say, this one might be my favorite, too!