My Precious Fabric Make: True Bias Tobie Jacket Reveal
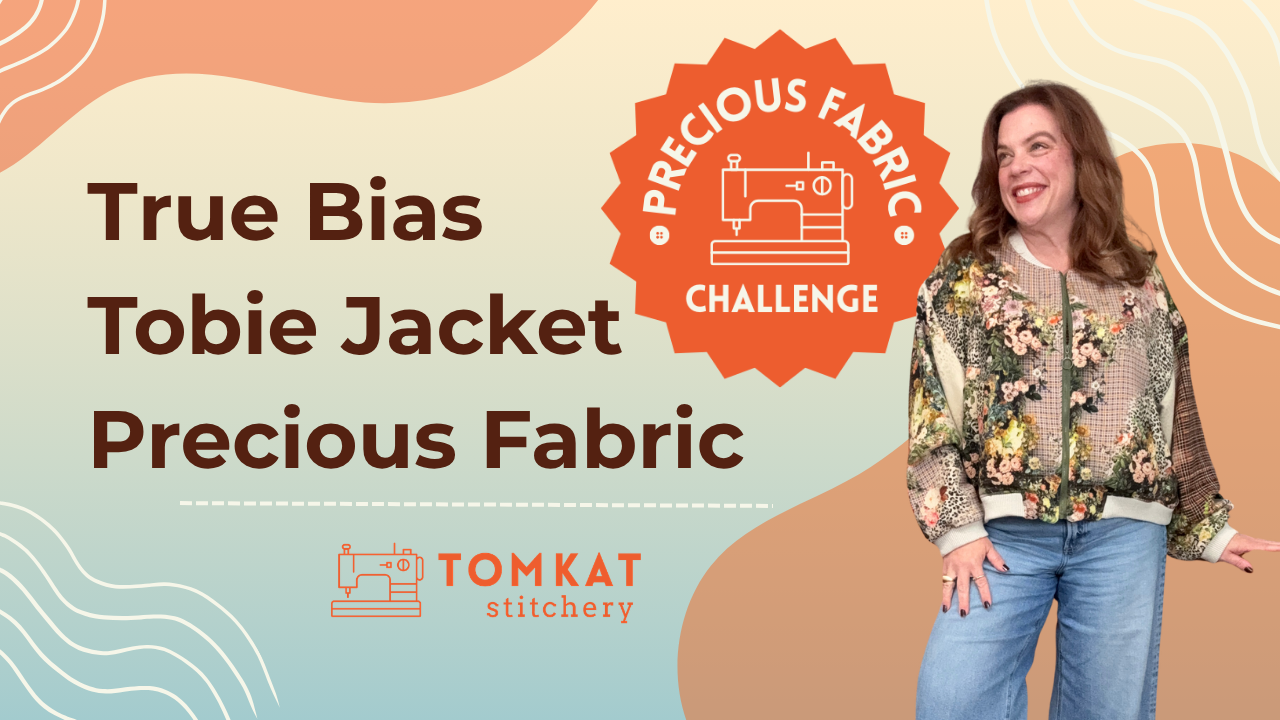
Eleven years. That's how long this beautiful piece of wool double gauze has been sitting in my fabric stash, waiting for just the right project. And I'm happy to report that I finally cut into it!
This fabric was actually the inspiration behind starting the Precious Fabric Challenge three years ago, so it feels especially fitting that I finally took my own advice and turned it into something I can wear. I used the True Bias Tobie Jacket pattern, and I think this might be one of my favorite things I've ever made.
Today I'm sharing the finished jacket, the fitting adjustments I made, how I approached cutting and print placement, and the construction decisions that helped bring this special fabric to life.
Read on or watch here:
The Fabric That Started the Precious Fabric Challenge
September marked our third annual Precious Fabric Challenge. The idea is simple: pull out that special fabric you've been saving and actually sew something with it!
I purchased this wool double gauze at an Association of Sewing and Design Professionals (ASDP) conference 11 years ago. I remember exactly when because my niece was born during that conference, and she just turned 11!
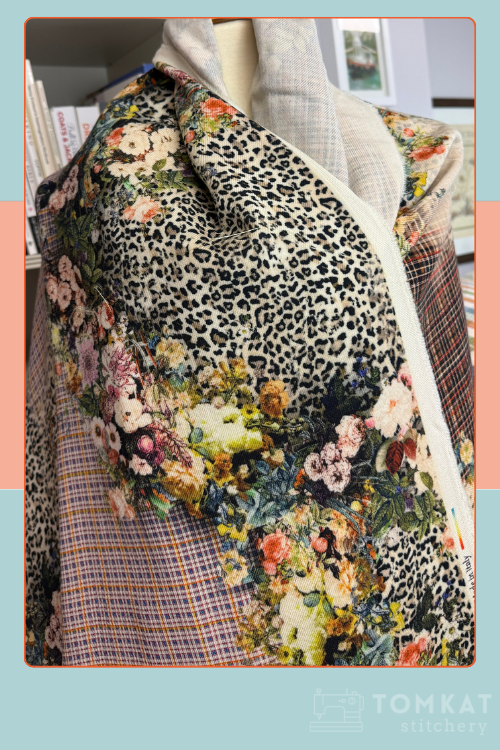
It's a designer deadstock wool double gauze featuring several beautiful plaid patterns. I loved it immediately but struggled to find the right project.
The fabric has some drape and a relatively loose weave, so I didn't think it would work particularly well for something highly tailored. I kept coming back to outerwear, and the Tobie Jacket turned out to be the perfect choice.
This fabric also inspired my fall capsule wardrobe. All those beautiful colors work with my spring color palette, and I'm planning the rest of my fall sewing around this jacket.
Why I Chose the True Bias Tobie Jacket
The True Bias Tobie Jacket is an oversized, fully lined jacket with two different views.
True Bias Tobie Jacket Pattern Features
- View A: Classic bomber styling with a ribbed neckline, cuffs, bottom band, and welt pockets.
- View B: Higher neckline, patch pockets, and self-fabric cuffs and hem with elastic.
- Fit: Relaxed, oversized silhouette.
- Construction: Fully lined with a front zipper closure.
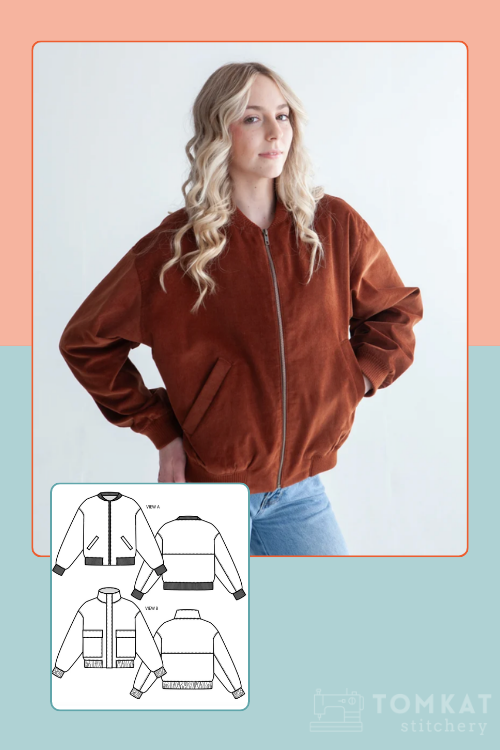
For my precious fabric, I chose View A. Its streamlined design lets the busy print take center stage without competing with additional details.
Making a Test Jacket Before Cutting My Precious Fabric
Before cutting into my wool double gauze, I made a wearable test version of View B in corduroy. You can see that jacket and read about the construction in my True Bias Tobie Jacket pattern review.
Making that first jacket helped me understand the construction and fine-tune the proportions before working with my irreplaceable fabric.
What Fitting Adjustments Did I Make?
Because the Tobie is oversized, I wasn't anticipating major fitting challenges, but I made two adjustments:
- Shortened the bodice by 1 inch. I made this adjustment on my corduroy version and carried it through to the final jacket.
- Shortened the sleeves by 3/4 inch. The wool double gauze has a tendency to grow because of its loose weave, so I wanted to keep the sleeves from falling over the ribbed cuffs.
I'm glad I made both changes. The jacket still has that relaxed silhouette, but the proportions work much better for me.
Cutting and Print Placement on Wool Double Gauze
This was probably the part of the project that required the most planning.
My wool double gauze features several different plaids rather than one repeating pattern. I needed to think carefully about how the colors and designs would work together once the jacket was assembled.
Why I Cut the Fabric in a Single Layer
I cut every pattern piece in a single layer rather than folding the fabric. This gave me complete control over print placement, allowing me to flip the pattern pieces for mirror images and position each one individually.
I also eliminated the horizontal seam across the back of the jacket. I included that seam in my corduroy version, but removing it here allowed the print to flow across the back without interruption.
Using the SewTites Magnetic Cutting System
One tool that made cutting this fabric so much easier was my SewTites magnetic cutting system.
I have two of their larger magnetic cutting mats that I put together to create a bigger cutting surface, and I absolutely love them!
This wool double gauze was surprisingly shifty, so keeping everything on grain was especially important. Since I was cutting each piece individually and paying close attention to print placement, I needed everything to stay exactly where I positioned it.
I used a printed PDF pattern and rotary cutter, and the SewTites system made it much easier to keep the fabric and pattern pieces in place. They're also fantastic if you use a projector for your sewing patterns.
I've had my mats for a year or two now, and they've become one of my favorite cutting tools.
If you're interested in trying SewTites, use my code TOMKAT10 to save 10% on their products.*
Do You Have to Match Every Plaid in a Statement Fabric?
Not necessarily! Sometimes it's more about creating balanced, intentional placement than perfectly matching every line.
With this fabric, I focused on making sure the different plaids worked together across the seams.
One of my favorite details was actually a happy accident. When Jenni saw the jacket on my mannequin, she pointed out that the darker plaid placement on the sleeves looked almost like elbow patches. I hadn't planned that, but it happened on both sleeves, and I love the effect!
Another surprise was how much the fabric's appearance changed after cutting. As yardage, it looked much lighter because of the beige background. Once I arranged the jacket pieces, the darker colors became more prominent.
If you're working with plaids, stripes, or large-scale prints and want to feel more confident about your cutting layout, my Fabric Print Matching class walks through techniques for matching prints across seams, zippers, and plackets.
Sewing and Lining My Tobie Jacket
Once everything was cut, this jacket was a dream to sew. The True Bias instructions were fantastic, and having already made the pattern once meant I knew what to expect.
Choosing the Jacket Lining
When I first shared my plans, I showed you a couple of lining options and asked for your opinions.
I ended up choosing a beautiful purple charmeuse jacquard from my stash. This fabric originally belonged to my sewing mentor, which makes it especially meaningful.
I'd already used portions of it for other garments, so I wasn't sure I'd have enough to line the entire jacket. Fortunately, I had just enough for the body and sleeves!
For the welt pockets, I made one small change. I prefer a more stable fabric for pocket linings, so I used linen scraps instead of the slippery jacquard. The back portion of the pocket is made from the outer jacket fabric because you can see a little of it when your hands are in the pockets.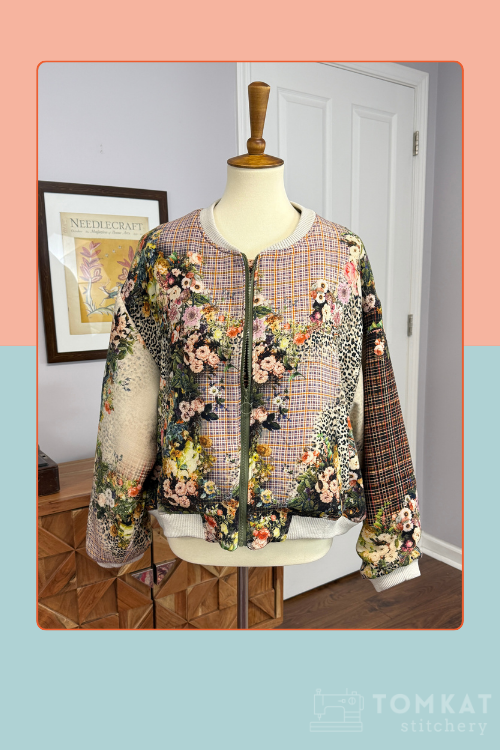
Choosing the Ribbing and Zipper
I waited until the jacket was mostly assembled before deciding on the ribbing and zipper.
I had narrowed the ribbing options to olive green and beige, and many of you shared your opinions when I first showed the fabric.
Ultimately, I chose the beige ribbing for the neckline, cuffs, and bottom band. Once I could see the jacket assembled, it just made the most sense with the print.
My only concern is keeping those light-colored cuffs clean, but we'll deal with that when the time comes!
For the zipper, I chose dark olive green. I love how it blends into the print rather than drawing attention away from the fabric.
Both the ribbing and zipper came from my stash, making this project even more satisfying.
The Finished Jacket: Was It Worth Waiting 11 Years?
Absolutely!
I am over the moon with how this jacket turned out. I love the print placement, proportions, lining, and how all the colors work together. It's exactly the kind of jacket I can see myself reaching for throughout fall and spring.
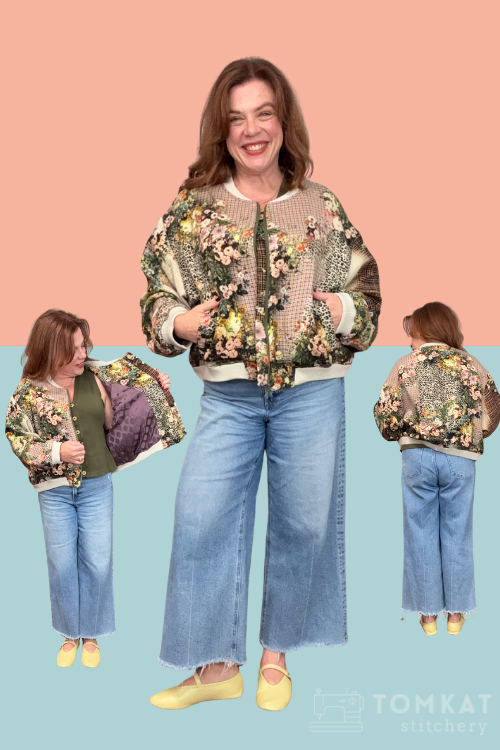
I've already worn it once on a trip to Grand Rapids, and now I'm even more excited to finish the rest of my fall capsule wardrobe.
Apparently, I'm not the only one who loves it!
My daughter was home for fall break and spotted the jacket in my bedroom. When I came out of the bathroom, she was trying it on!
Some of you might remember the embroidered Cashmerette Kimble Bomber Jacket I made. That jacket has already found its way into her wardrobe in Louisville.
So when I saw her wearing this one, I immediately told her to take it off!
I love my children dearly, but this precious fabric jacket is staying with me.
*Affiliate links included—thank you for supporting my work! No extra cost to you, but I may earn a commission. Offers may change.