Tutorial: Stabilize Seam with Cotton Twill Tape
Have you ever put on a pair of linen or rayon pants that fit beautifully in the morning, only to discover that the crotch has stretched and started sagging by the end of the day? Some fabrics naturally relax as you wear them, and that extra movement can create a droopy crotch or baggy seat—even when the pants fit correctly.
The good news is that you can prevent this with one inexpensive sewing notion: quarter-inch cotton twill tape. In this tutorial, I’ll show you how I use twill tape to stabilize the crotch seam while sewing a pair of pants or shorts. I’ll also explain how to add it to a finished garment that has already started stretching.
Read on for the complete tutorial, or watch the video on YouTube to see each step in action.
Why Does a Crotch Seam Stretch?
The crotch seam is under quite a bit of stress as you sit, stand, walk, and move throughout the day. It also includes curved and partially bias-cut sections, which are more likely to stretch than fabric cut on the straight grain.
This can be especially noticeable in fabrics such as linen and rayon. These fabrics often have beautiful drape and movement, but they may relax with wear. Stabilizing the crotch seam helps it retain its intended length and shape instead of gradually growing throughout the day.
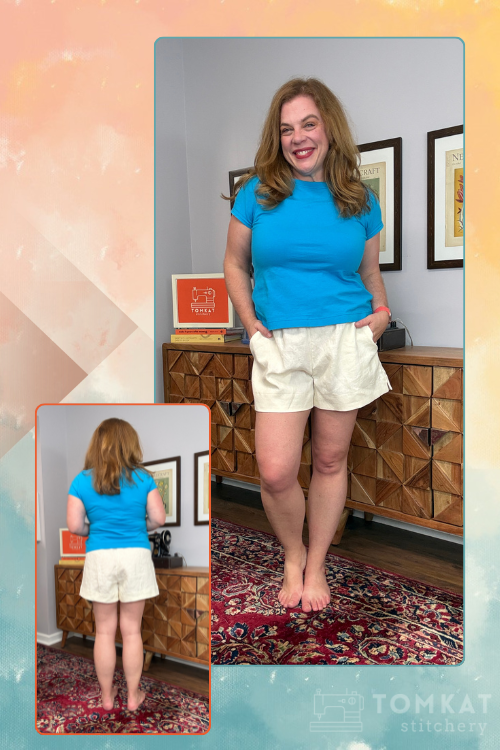
For this tutorial, I’m sewing the Closet Core Adriana Shorts in linen. The Adriana Shorts have a high rise and an integrated elastic waistband, but you can use this technique with many different pants and shorts patterns.
What Do You Need to Stabilize a Crotch Seam?
You only need a few basic supplies:
- Your pants or shorts, with the crotch seam sewn
- Quarter-inch-wide cotton twill tape
- Coordinating thread
- A sewing machine
- Scissors or thread snips
Cotton twill tape is firm enough to prevent the seam from stretching, but it is still soft and flexible enough to be comfortable inside a garment.
When you look closely at narrow twill tape, you may notice that one edge is straight while the other has a slightly scalloped or picot-style finish. I line up the straight edge with the existing crotch-seam stitching.
When Should You Add the Twill Tape?
The easiest time to stabilize the crotch is after sewing the crotch seam but before finishing its seam allowances.
Pants patterns use different construction methods. Some instructions have you sew the front crotch and back crotch separately before joining the legs. Others have you construct the right and left legs first and then sew one continuous crotch seam.
Either method works. You simply need to reach the point where the relevant section of the crotch curve has been stitched.
Where Should the Twill Tape Begin and End?
Where you position the tape depends on the garment’s construction.
If the pants have a separate waistband, run the twill tape from the top of the crotch seam to the bottom of the curve. The upper end will eventually be enclosed by the waistband.
For a fly-front pattern, begin at the bottom of the fly and continue around the crotch curve. You do not need to add tape through the fly itself.
The Adriana Shorts have an integrated waistband that folds over to create an elastic casing. I begin the tape slightly inside that waistband area, but below the fold line, so it does not interfere with the casing.
How to Sew Cotton Twill Tape to the Crotch Seam
- Position the garment.
Place the garment wrong side up so you can clearly see the crotch seam and seam allowance. - Align the twill tape.
Position the cotton twill tape over the seam, lining up its straight edge with the original crotch-seam stitching line. - Stitch the tape in place.
Using a regular straight stitch, sew down the center of the twill tape. Follow the crotch curve carefully and keep the tape flat as you sew. - Trim the twill tape.
You do not need to measure and cut the tape beforehand. I prefer to work directly from the roll, sew to the end of the seam, and then trim the tape. - Repeat on the remaining section.
If the front and back crotch curves were constructed separately, repeat these steps on the other crotch section. - Finish the seam allowances.
Finish the seam allowances according to the pattern instructions. I used my serger, which also caught the edge of the twill tape. It is fine if your seam finish does not catch the tape—the straight stitching through its center will hold it securely. - Continue constructing the garment.
Once the twill tape is attached and the seam allowances are finished, continue sewing the pants or shorts according to the pattern instructions.
Should You Measure the Twill Tape Against the Pattern?
If you are concerned that the crotch seam stretched during handling or construction, you can measure the pattern’s original stitching line and cut the twill tape to that length.
Gently ease the garment’s seam back to the correct length as you attach the tape. This can help restore a section that has already grown slightly.
For most of my projects, I simply place the tape along the sewn seam without stretching either the garment or the tape. That has worked well for me, but measuring against the pattern is a useful extra precaution when working with a particularly unstable fabric.
Can You Add Twill Tape to Finished Pants?
Yes! You can stabilize the crotch seam of pants or shorts that are already finished, including ready-to-wear garments. You do not need to unpick the waistband or take the pants apart.
First, wash and dry the garment according to its care instructions. This gives the fabric an opportunity to recover as much of its original shape as possible before you secure the seam.
Turn the pants inside out and locate the crotch-seam stitching. Fold under the raw end of the cotton twill tape to prevent fraying, then place its straight edge along the seamline.
For fly-front pants, begin at the bottom of the fly. Sew through the center of the tape, following the crotch seam from front to back. If the pants were constructed with the legs sewn first, you may be able to attach one continuous piece of tape around the entire curve.
When you reach the waistband, fold under the remaining raw edge and backstitch securely. The stitching will be visible only inside the pants.
Will the Twill Tape Feel Uncomfortable?
Because quarter-inch cotton twill tape is narrow and relatively soft, it should not feel bulky inside the garment. It sits directly over the seam allowance and becomes part of the interior seam finish.
Be sure the cut ends are folded under or enclosed in the waistband so they do not fray or create a scratchy edge.
A Small Step That Makes a Big Difference
Adding cotton twill tape takes only a few minutes, but it can make a noticeable difference in how linen, rayon, and other fabrics behave throughout the day. The tape supports the crotch curve, helps it maintain its intended length, and reduces the bagging that can develop with wear.